 If you’ve been fly fishing for any length of time, then you probably tie your own flies.
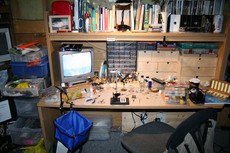
Chances are, you have a large workspace set aside for fly tying — like a fly tying table or workbench.
Here are some tips for keeping that workspace neat and tidy, as well as some of the must-have items you should have at your fly tying bench.
Your Fly Tying Bench
- For starters, you will want to have a large enough space for your fly tying table where you are comfortable and can have a little privacy when tying flies.
- Always keep your fly tying table well-organized and clean. A cluttered fly tying table makes it difficult to find the fly tying supplies you need. Everything should have its own place and be easily accessible.
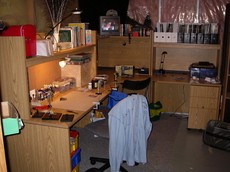 Ideally, you will want your fly tying table to be located on a wood or tile floor in order to prevent hooks, beads, and other small parts from becoming caught (or lost) in the carpet if you drop one.
- Your workbench should be equipped with a good quality gooseneck lamp that enables you to adjust the angle of the lighting as you work.
- The table you use for fly tying doesn’t have to be fancy, or an “official” fly tying bench, but it should be workspace that is used only for tying flies. You can use any old table, as long as it’s sturdy. It’s best not to use a folding table or a card table, as those don’t hold much weight, and the last thing you need is for the table to collapse if you lean on it wrong — sending all of your fly tying supplies crashing to the floor! If your fly tying table has a drawer or two in which to store fly tying supplies, all the better.
- If you are using a vise, your best bet is to place it in a shallow cake pan, an old cardboard shirt box, a shallow cookie sheet or some other tray. Or, place such an item (or a trash can) on the floor underneath the vise. This allows clippings to fall directly into the container for easy cleanup.
- Keep fly tying tools and supplies separated — such as chenille, floss, thread, tinsel and wire. If you put them all together, they will become a tangled mess that will take you hours to sort.
- Chenille, floss, fur and feathers can be stored in plastic containers. Buy a few plastic fruit cups with lids at the dollar store for beads and eyes. Or, practice good recycling by saving film canisters, margarine, sour cream and dip containers to hold your smaller fishing items. Another option is to buy an organizer that has small compartments and drawers for your smaller fly tying materials.
- Hooks can also be stored in plastic containers of various sizes. Or, get a hook box which is specifically made so you can easily remove a single hook as it’s needed.
- Fly tying paint and glue can be stored in rectangular containers, or even in a shoebox.
- A perfect way to store dubbing is in plastic pages, like 3-ring business card holder sheets that can be purchased at any stationary or business supply store.
- As you organize all of your fly tying supplies, use address labels, blue painter’s tape, or even regular tape and a Sharpie to label each container with the name, size and color of the supplies that it holds. This will allow you to quickly find exactly what you are looking for.
Now that you have your fly tying supplies organized, you’re ready to being tying flies on a clutter-free table. You’ll be amazed at the difference it makes!
I enjoy writing about my life experiences — including the fun times I've had while fishing and enjoying nature. In my fly fishing articles I like to share helpful how-tos to help newbies grasp the most basic concepts of fly fishing.

