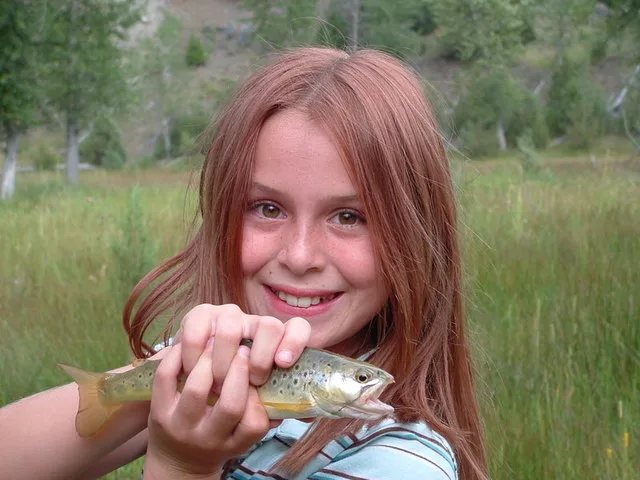
This is Dakota. She practices fly fishing CPR: Catch, Photograph, Release.
Look at that smile. Isn’t she cute?
Dakota is my niece. She came to see me last summer here in Montana and she learned how to fly fish.
She now has this picture as a reminder of her experience.
Why CPR?
Here’s the thing. If someone before Dakota had caught that fish and not released it, this photo wouldn’t have been possible.
It’s just that simple.
There are many schools of thought on catch and release fishing and I follow the the philosophy that we — as anglers who love to go fishing and actually catch fish — need to help take care of our fisheries.
We can help do this by releasing the fish we catch so they can grow, produce offspring and others can enjoy the resource.
Tips For Taking Good Fishing Photos
I’m no photographer. With today’s digital cameras, a person doesn’t have to be a pro shutterbug to capture a good, trophy picture.
I have learned a couple of things from some of my fly fishing friends who are professional photographers over at TrophyFishingTN and The Itinerant Angler.
Those folks have forgotten more about photography period than I’ll ever know, but I try to learn something from them.
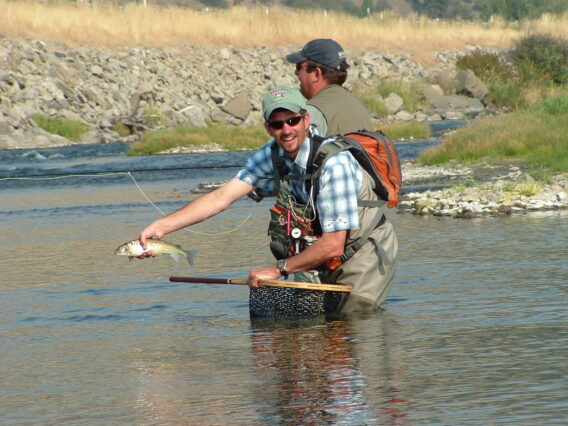
Here are just a couple of tips that will help you catch great shots — instead of just another picture of an angler, standing in the river, holding a fish, like this:
This is a shot I took one day of a buddy of mine, standing in a river holding a fish. I mean, it’s a nice enough shot. Good light, good angles, good pose, but it could have been much better if I had been closer and filled the frame with the subject matter — like in Dakota’s picture above. Fill the frame. Fill the frame with what’s important.
Pay Attention To The Lighting
I don’t know how many pictures I’ve taken when the subject was in bad lighting. It’s always disappointing to think you have a good shot captured but then when you see it, it just isn’t what you had hoped for.
Take a couple of extra seconds to get into position so the sun is at your back and shining on the subject. Sometimes it’s impossible. Usually though, by turning the angler a different direction you can get a much better shot.
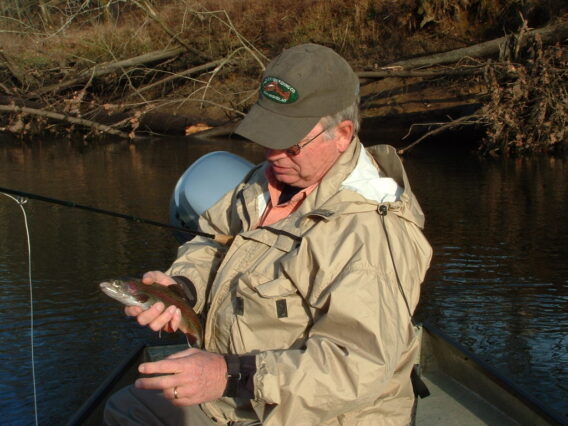
One day, Dan and I were fishing together and he caught this little rainbow trout. I wanted to get a picture of the moment because we were having such a fun time on the water. As soon as I brought the viewfinder up to my eye, I could tell the lighting was bad.
Instead of seeing Dan and his fish, all I could see was a dark shadow and a glaring brightness behind him. The sun was behind him and staring the lens in the eye. It took me 3 seconds to turn the boat around and get this shot with some way better light.
Some folks would still say this shot is not good because I didn’t capture a complete image of Dan’s face. Could be. I like it because it captured the moment. He was talking to the fish at the instant I snapped the shot. Granted, if you weren’t there you wouldn’t know that. Guess you had to be there.
The Eyes Have It
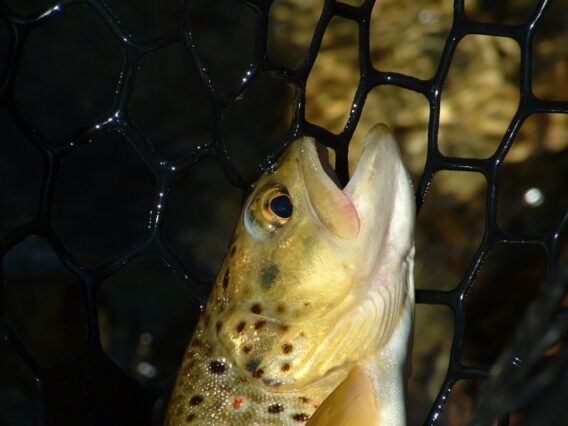
When you want to get a closeup shot of a fish, focus on the fish’s eye. It makes the picture much more interesting.
See how the frame is filled, the colors of the fish really pop out and the wet rubber of the catch and release net adds some character to the shot?
I know it’s sometimes difficult to get everything lined up quickly. Quickly is a key thing for the fish’s health. You want to handle the fish gently and return it to the water as soon as possible to help ensure a good release. Once you get these little tips in your mind though, you’ll find yourself getting into a good picture-taking position while your fishing partner is fighting the fish. It just starts becoming natural.
Set Up The Shot
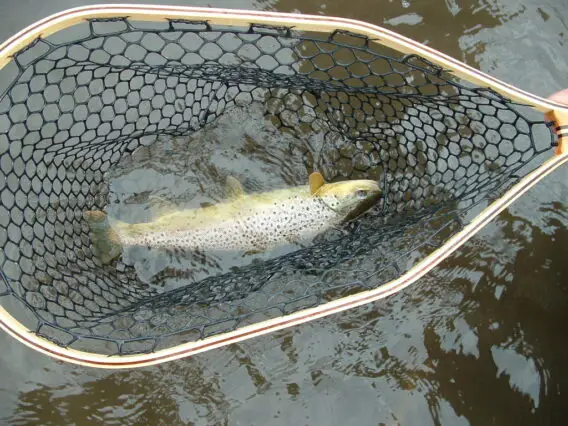
Here’s a picture that could have been so much better if I had taken a few more seconds in setting up the shot.
This is a nice 20-inch brown trout from last fall. The fish took a dry fly and fought a long battle. I was concerned about getting it released as soon as possible, so I just forgot all about the pose.
The fish is laying in the bottom of the net, in the water. The angle and the depth of the fish in the net didn’t help. Nor did the lighting. Nor the fact that it looks upside down. I should have turned the net around, lowered the net frame close to the fish, and paid attention to my lighting.
I know many of these things can be fixed with photo editing programs, but not by me. I barely know how to turn the camera on, much less fix a messed up photo. I need to try to get as good a shot as I can get from the word go.
Sometimes, you just can’t get it all together.
Angles And Sunlight
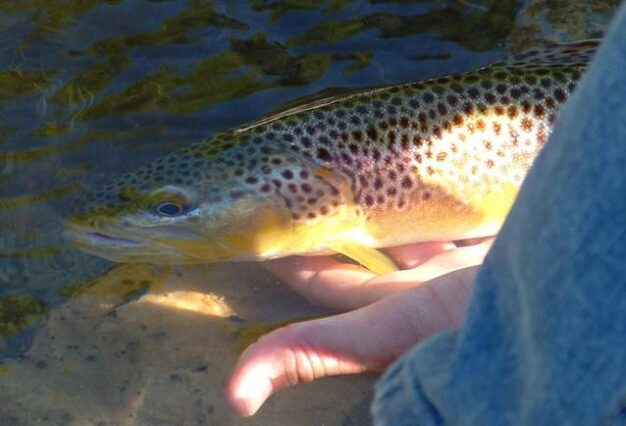
Finally, here’s a shot I tried to get of a release of a nice little brown trout. The fish was in the water, the light was not the best, but there was no way to get a different angle due to the location. It is fairly interesting.
I got lucky because of the way the sunlight plays off of the side of the fish and the angler’s hand. Still, I wish I would have noticed this in the viewfinder and asked the angler to move to the right just a little to get the fish’s eye in the sunlight.
I still like it and I have this photo to remind me of a great day on the river. Plus, that fish is alive and well due to fly fishing CPR. I have no doubt it will go on to help produce another generation of brown trout, that someone else will be able to enjoy.
Take your camera. Take your pictures. Leave the fish. Practice fly fishing CPR.
Here are some more tips for taking great photos on your fishing trips!
Sharp Hooks and Tight Lines,
Ron

